Letting Go of Control and Embracing Serendipity.
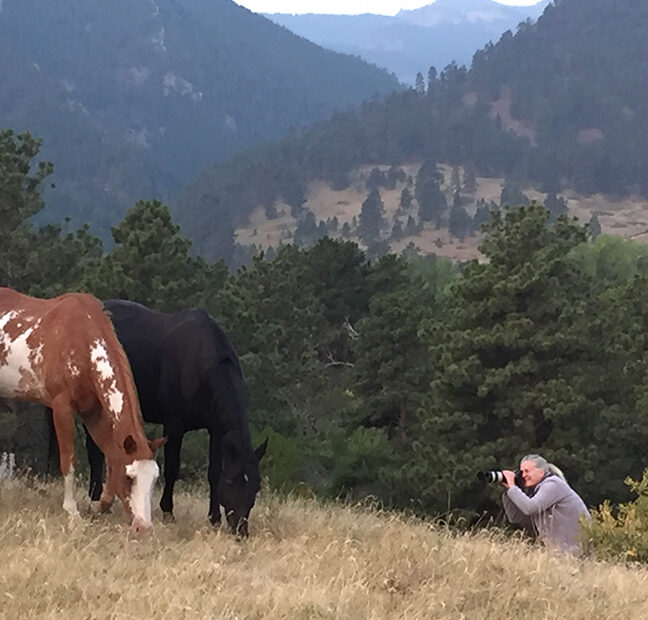
Photographing horses is both a challenge and a joy. You can plan only so much—after that, the best images happen when you let go, pay attention, and allow moments to unfold naturally. Horses are expressive, unpredictable, and deeply present, which is exactly what makes them such compelling subjects.
Horse photography doesn’t lend itself neatly to a rigid “how-to” formula. And neither does encaustic. Both processes reward intuition, patience, and responsiveness. This guide isn’t about technical perfection—it’s about helping you think intentionally about the images you want to create and how to photograph horses with your final encaustic vision in mind.
There are three primary ways to incorporate photographs into encaustic work, and how you shoot may differ depending on the process you plan to use. The good news? Most photographs will work for one encaustic method or another.
One important exception: images that rely heavily on subtle shadow detail. Wax tends to obscure or destroy intricate shadows, so images with delicate tonal transitions in dark areas may not translate well.
Thinking ahead—before you press the shutter—can save you frustration later in the studio.
1. Choosing the Right Background
Background matters in some encaustic processes and not at all in others.
If you plan to mount your image and work directly on the entire photograph, the background becomes part of the composition. Ask yourself:
-
What color is the horse?
-
Does the horse stand out from the background or blend into it?
-
Is the environment visually pleasing—or distracting, like an unattractive barn or trailer?
Pay attention to all four corners of your frame. For encaustic work, shooting with a wide-open aperture (a smaller f-number) can help soften the background and reduce visual clutter.
If, however, you plan to isolate the horse later—using a photo transfer or printing on non-traditional paper—the background becomes far less important. In those cases, you can focus entirely on gesture, form, and expression.
2. Understanding a Horse’s Ears
A horse’s ears communicate more than people often realize, and they can dramatically change the emotional read of an image.
-
Ears relaxed or flopping sideways usually signal calmness.
-
Ears pinned back tight to the neck often indicate anger or irritation.
-
Ears pricked forward suggest curiosity, alertness, or engagement.
Many photographers prefer ears forward because they create a sense of connection with the viewer. But don’t dismiss images with ears back—those can convey speed, power, or attitude and may work beautifully depending on your artistic intent.
3. Photographing Horses in Motion
Safety always comes first when photographing horses running free. Make sure you can move quickly and position yourself out of harm’s way. Be especially cautious if you sit or kneel—always know your exit.
Look for level ground. A horse running downhill can feel visually awkward, particularly in individual portraits. That said, a group of horses descending a hill with dust rising behind them can create a dramatic, powerful landscape image.
Consider your angle:
-
Horses running toward you create intensity but can exaggerate head and body size.
-
Side views emphasize movement and rhythm.
-
Longer telephoto lenses help minimize distortion when shooting head-on.
If your goal is to freeze motion, use a fast shutter speed. If you want blur and movement, slow things down and experiment.
Before the action begins, study the scene. Anticipate where the horses will move. Be intentional—avoid “spray and pray.” Choose one horse and follow its rhythm. Images often feel most dynamic when the front leg is reaching forward; shots where all the weight is on the front legs tend to feel heavy or awkward.
4. Where You Stand Matters
Your position relative to the horse can completely change the feeling of an image.
Try different perspectives:
-
Get lower to emphasize size and presence.
-
Shoot at eye level for intimacy.
-
Step back to allow more space for spontaneous moments.
Standing farther away not only improves safety, it often results in more natural, unforced images—especially when working with energetic or unpredictable horses.
5. Lighting Considerations for Encaustic Work
Wax is a great equalizer—and shadows are its biggest challenge. Shadow detail is often lost once wax is applied.
Many iconic horse photographs—dust clouds, rim lighting, silhouettes, sunrise and sunset shots—are visually stunning but don’t always translate well into encaustic. These images rely heavily on contrast and shadow detail, which wax tends to flatten or obscure.
When photographing specifically for encaustic, flatter, even lighting often works better than dramatic light.
6. Slow Shutter Speeds and Panning
There’s no formula for successful slow shutter speed or panned images. This technique requires experimentation and practice.
By tracking the horse as it moves and using a slower shutter speed, you can create motion blur in the background while keeping part of the horse relatively sharp. When it works, the result can be expressive and energetic.
Be aware, though, that slow shutter images can be difficult to isolate in photo-editing software. Blurred edges make precise selections challenging, which may limit how the image can be used in encaustic.
That said, panned images often work beautifully for image transfers, even if they aren’t ideal for tissue paper printing.
7. Freezing Action with Fast Shutter Speeds
Fast shutter speeds allow you to freeze motion, but they require balance. Higher shutter speeds often mean:
-
Wider apertures
-
Higher ISO settings
-
Or both
For slow movement, 1/100 second may be sufficient. For a horse in full gallop, you may need 1/1000 second or faster.
Lens focal length also plays a role—the longer the lens, the faster the shutter speed you’ll need. Review your images often while shooting and adjust as needed.
8. Deliberate Over-Exposure
In flat light or when you want a more graphic outline of a horse, deliberate over-exposure can be incredibly effective.
Over-exposed images:
-
Introduce mystery by allowing highlights to blow out
-
Simplify forms
-
Make isolating the subject in editing software much easier
This technique requires manual control of ISO, aperture, and shutter speed. You may need to over-expose by four stops or more. Bracketing exposures can help you find the sweet spot.
9. Changing Your Perspective
Shift your point of view:
-
Get very close
-
Shoot from above or below
-
Photograph from behind
-
Focus on fragments rather than the whole horse
Trying an unfamiliar perspective can open the door to entirely new ways of seeing—and new encaustic possibilities.
10. Layering Multiple Images in Encaustic
Think of encaustic photography as hands-on Photoshop. The process lends itself naturally to layering images, pigments, and wax into a single piece.
As you photograph, think in layers:
-
Strong lines and shapes
-
Close-ups of markings or textures
-
Details that could act as visual anchors
Each photograph becomes a piece of a larger puzzle. When layered thoughtfully, these elements come together to create work that feels tactile, dimensional, and deeply expressive.
Photographing horses for encaustic isn’t about controlling every variable—it’s about being present, observant, and responsive. Let the horses lead, trust your instincts, and leave room for surprise. That’s where the most meaningful images—and the most compelling encaustic work—begin.
Curious what this approach looks like in practice?
→ Join me at the Wyoming Ranch Workshop
Let me know in the comments below what has been your experience with photographing horses for working with encaustic. I always love to hear other artists tips and tricks.
Be well….be creative,
Clare
Learn how photographs, wax, and intuition come together.
View my photo encaustic classes, courses, and workshops.