Tips for Printing + Mounting an Image for Photo Encaustic.
There are three ways to incorporate photography with encaustic medium, one of the most common is to mount your image to a hard substrate and layer the encaustic on top of the image.
Paper Selection
The first thing you have to think about for this method is to determine a paper that will be porous—a paper that will accept the first layer of wax so that each subsequent layer can be fused allowing the piece to become one.
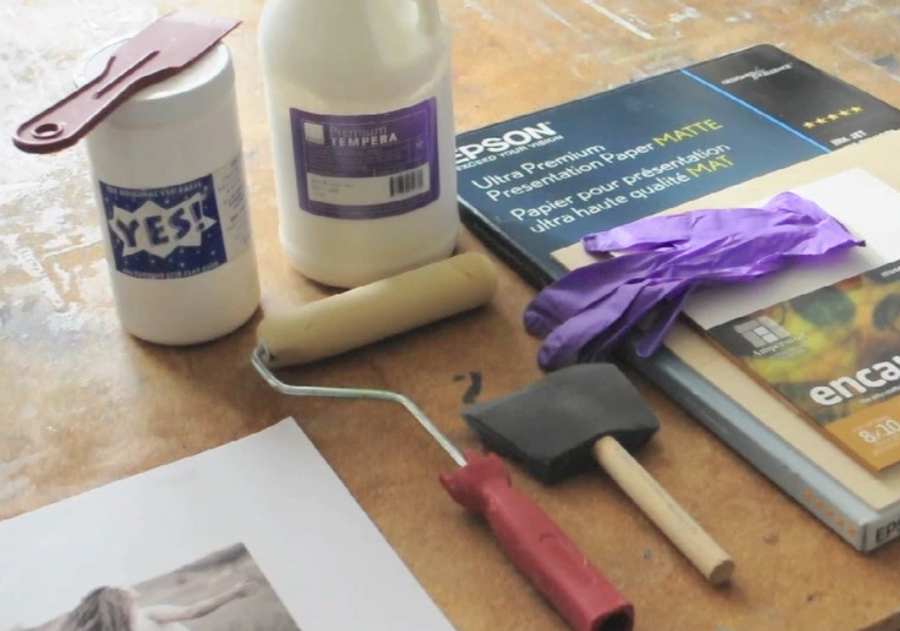
I use Epson Ultra Premium Presentation Matte paper with my Epson printer.
It’s your choice to use an inkjet or toner based print. They will both work. Just make sure that the paper is a matte not glossy paper. For longevity purposes make sure the ink that you choose is archival.
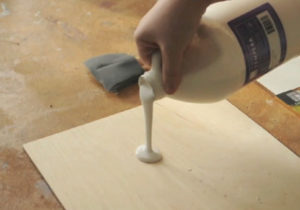 When wax soaks in and is fused, the paper becomes somewhat translucent. So, if you choose to go with a natural wood surface you’ll want to paint the wood with a thin layer of white tempera paint (or encaustic gesso) so the grain of the wood does not show through when the first layer of wax is fused into the photograph
Printing
In whatever computer software program you use, size your photograph to the size of your board PLUS ½ inch. So if have 8×10 board crop image to approximately 8.5 x 10.5. This is the best way to make sure the image will cover the entire surface of the panel and will make placing your image on the glued board much easier. It’s important that you have the photo take the entire surface of your substrate, otherwise, it can be difficult to get smooth layers of wax as ridges often form at the paper line.
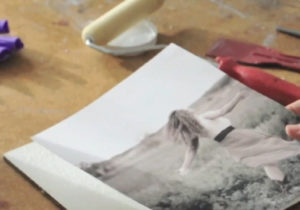 Once you have your image printed on a porous matte paper trim the white borders from your image.
Put your image aside.
Gluing
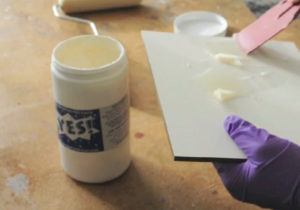
So now it’s time to glue your image to your substrate. Personally I use Yes! Paste, other artists use other types of glue. You just want to make sure that the glue can withstand the heating process of fusing. Use a putty knife to apply a thin coat of paste to the front of the board.
You are going to want to make sure that the glue doesn’t slop and get onto the side of your board. If it does, it’s going to make the trimming process harder as you’ll be cutting through globs of dried glue to get to your image which increases the chance that you’ll rip the photo.
Once you have a thin coat, roll it with a foam roller to get out all the ridges from the putty knife that I use.

Carefully place your print on your substrate—making sure your entire image covers the front of your board. This is one of the reasons we print slightly larger than your substrate. Otherwise it can be hard to exactly match the print to the board.
Cover the image with a paper towel to protect it and smooth out any air bubbles with your hands (or a rubber brayer if you have one). Work from center outward. Make sure edges are fully glued down.
Make sure all the bubbles are out. Recovering from air bubbles is difficult, as the wax will not lay flat on your image.
Remove any excess glue from edges that seeped out. This is the second reason we print larger than the substrate as it creates a slight lip to contain any glue seepage.
Let it dry overnight. As some moisture will wick from the image lay a paper towel down first and put your image face down. Place, books, tiles, or any other weighted material on top. Let dry.
Trimming
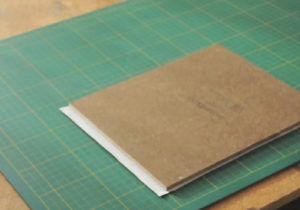
For trimming make sure your instrument – razor or box cutter – is sharp.
Place facedown and cut your image clean to the edges of the board.
You are now ready to start adding wax to your image.
I’d love for you to share your comments and tell me if you have any other tips and tricks for printing and mounting your images to your substrate.
Be well….be creative,
Clare
Learn how photographs, wax, and intuition come together.
View my photo encaustic classes, courses, and workshops.
Thanks for the review. If you use an encaustic broad do you need to use gesso?
Hi Gretchen, personally I don’t use an encaustic board or gesso. When mounting a photo the photo paper becomes your ground and there is no need for gesso or the encaustic board. The tempera paint is used only as a visual barrier between the board and the photo paper as the wax will make the paper translucent and you may or may not see the coloration of the board below (all depends on the image and the thickness of the paper.)
Hi Clare.
Thanks for the info. I’m using the same technique, except I don’t usually mount my photo flush with the edge. I build my own cradled panels 2″ larger than my finished borderless print. I route the edges, stain and varnish the wood then mount the print with 1″ of wood showing on all sides. It’s a stylish look I really like.
I like it. And love that you are thinking ‘out of the box’ and doing it a little differently.
Hi Clare – Thanks for your post. I ‘ve been using YES paste as well, but as many of my pieces are large (24″ x 24″ or more), I often find it hard to work with the paste. Do you have any other glue suggestions? A friend recently suggested bookbinder’s glue.
Hi Nancy, you are welcome. You can add a little water to the Yes! paste to allow it to flow a little easier …. if you experiment with other glues (and there are lots of alternatives) just make sure they will withstand the heat of fusing. I once tried an adhesive that was in a sheet form that adhered to the back of the image…..and it completely bubbled when I fused. So go cautiously and ask questions of the manufacturer or a good art supply store.
Large pieces are more challenging but if the paper if thick enough it will withstand being pulled up to release a bubble you can’t roll out with your brayer. The paper is the trick for me. Have used YES for years and have had no bad experiences with it. Some hate it; some love it.
Yes absolutely…..mounting large pieces on thin paper is so much more challenging:) Glad you are having success!
Hi Clare, Great information here. I don’t use YES as it is not archival I know some folks probably don’t care. I use PVA and add methocellos, (50% each), when mixed together it leaves a window for moving your image around and/or taking it off and re-doing. I got this information from my bookmaking friends. Dick Blick has PVA and just google for the meth cellcos it’s a dry powder you mix with warm water. I mix a large batch of this and just cover the extra so I always have some made up and handy. It really is very simple to make. Also, I don’t use the gesso, I cover the board and the back of the image with 2 coats of the glue drying overnight, so the glue can be soaked into each. The next day I coat again the board and back of the image and then place the photo carefully on the board at a corner and slowly smooth down the image with my hand sweeping across in order to get the bubbles out, (yes they can be a bitch). Then use wax paper or release paper over top and using a roller roll from the inside out firmly but gently.
My paper is a 300gsm weight so it can stand up to all of this. Plus my images are very large so if I can I get someone to help it does make it easy (30×40″). This formula is great for large pieces due to the open window. If you have a thinner paper I can see using the gesso to have a white background, as you say one does have to watch the first coats of wax getting too hot and soaking thru to show a dark spot where the board shows thru. I learned this the hard way. This is just my two cents worth. I look forward to your Monday blog each week, keeps me motivated when I need it. Thank you
Hi Francesca, thanks for sharing your process. I think that all artists should be concerned with using archival processes, so I’m unsure why you say that Yes! paste is not archival? The manufactures claim “Yes! paste is water-based, clear when dry, non-toxic, slow to set, recyclable, and acid free for archival work.” I’d be interested to know if you’ve had a different experience with the product. Personally I’ve never had an issue with it. Nonetheless, I appreciate your sharing an alternate process and how you work with larger images.
I was on the verge of trying “yes” paste until I read a number of posts that detailed bad experiences with it over time, most from very experienced artists whose opinion I respect. Several of them acknowledged that the manufacturer claims it is archival, but that their experience suggested otherwise. Google ” archival qualities of yes paste” or something to that effect and a lot of information will come up. Personally, I’m not going there.
Thanks for your comment Judy. Archival is really an inconsistent term and can get rather complicated. On a spectrum is Yes! paste the most archival, probably not as it’s a wet paste and not a dry substance that is mixed for the immediate application at hand. One might question if there is some sort of preservative in the paste that allows it to stay moist over time and not mold. On the continuum of ‘archivalness’ Yes! paste might not be at the top, but it’s a benign product for these purposes and isn’t going to produce acid. In addition, to be higher on the continuum the product should be reversible. But for the application on mounting and encapsulating an image in wax there isn’t a need for the product to be reversible. But at the end of the day as an artist you have to be comfortable with the products you are using and I encourage every student to use a product that works for them.
So Judy Wood, what do you use instead? I am only asking because the only way I can get Yes! is by purchasing over the internet. I am curious of other adhesives that work.
I use acrylic soft gel medium, very carefully, as getting any on the top of the paper would be the kiss of death. I have found that dampening the back of the paper before gluing helps a great deal in air bubble prevention.
I have also tried the methycellulose glue that bookbinders use, but not extensively. If I recall correctly, it wasn’t as effective with the heavier presentation paper, but likely would work well if the paper was weighted down overnight after gluing. It’s been a while since I tried it, so I don’t remember exactly what I did
Has anyone tried Miracle Muck?
Hi Nicole, I have not tried it, but whatever you use you want to make sure it’s archival and can stand up toe he heat of the heat gun!
Thanks Clare! What about adhesive mounting paper or spray? I have seen some posts online that suggest this method.
Just make sure it’s archival and can stand up to the heat of fusing.
Hello Clare, fascinating process. I am just beginning this journey.
I do have a question if I may regarding the rigid substrate. Does this need to be a specific material? I was thinking of some 3mm MDF from the hardware store but am uncertain if this will be archival?
Cheers Steve
Hi Steve, if you are just beginning the journey I highly recommend that you consider taking my intro class, The Artistic Image. I go through every aspect step by step that will have you tons of time and money in mistakes.
But to answer your question. Yes, any hard substrate will work as long as you can properly mount your image. My guess is that MDF is not archival, but that may not be your focus when you are learning.
Hope that helps.
Hi Clare.
I’ve been printing on a luster surface paper, Moab juniper baryta rag.
I’d love to try this paper with encaustic… in your opinion will it work?
It’s not ‘glossy’, but it’s not truly matte either.
Any thoughts would be appreciated!
Thank you.
I have not worked with this paper. It will work if it’s porous. My advice is to test it and see if the wax soaks into the paper.
Thanks!