And then you print it. And somehow, it’s less than it was on the screen.
That gap — between what you saw and what the image could hold — is what brought you here.
(Beginners Course)
Open February 23 – March 25
A six-module course in photo encaustic — for photographers who want their images to go further.
You’ve made thousands of photographs. Some of them are genuinely good. A few of them are the kind that stop you — something in the light, the composition, the moment — and you think: this one is trying to say something more than what it shows.
And then you print it. And somehow, it’s less than it was on the screen.
That gap — between what you saw and what the image could hold — is what brought you here.
What is photo encaustic?
It’s what happens when a photograph meets beeswax.
You print your image and bring it into layers of molten wax and pigment. You build. You fuse each layer with heat. You scrape, mark, embed, transfer. Slowly, the photograph becomes part of something physical — something with depth you can see into and texture you want to touch.
Here’s what makes beeswax different from every other medium: it doesn’t reflect light back at you. It pulls it in. Light passes through each translucent layer and seems to come from somewhere inside the work itself. That luminosity — that sense of being drawn toward something rather than just looking at it — is not a technique. It’s physics. No digital process, no other alternative medium, can replicate it.
The result is a photograph that no longer sits behind glass. It draws the viewer in.
Not for painters who want to add a photograph. Not for mixed media artists curious about the camera. For photographers — with DSLRs, mirrorless bodies, and iPhones — who have spent years learning to see, and who are ready for a process that honors that.
Most photo encaustic courses are taught from the encaustic side. Wax first, image second. This one is taught from the photography side, by someone who has never stopped thinking like a photographer. The image is the beginning of everything here. The wax is what takes it somewhere a print never could — ending the conversation before it really began.
What matters is how you see. And if you’ve been making photographs for a while — with a professional body or an iPhone you pull out because the light on the water is doing something extraordinary — you already have the most important thing this course asks of you.
“For the first time in 25+ years as a photographer, I actually feel like an artist.”
— Kelly Fitzsimmons



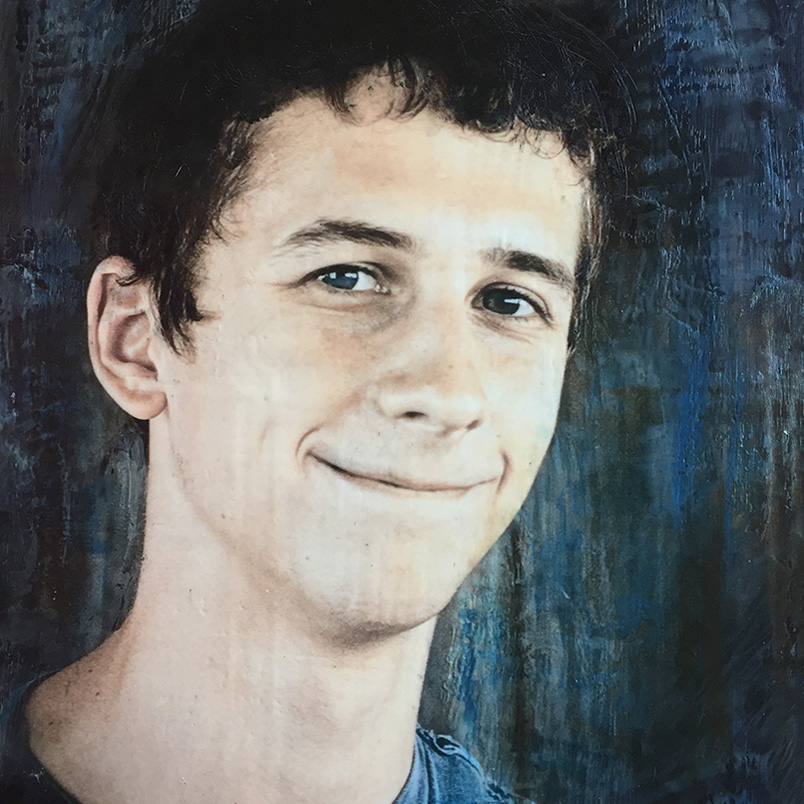
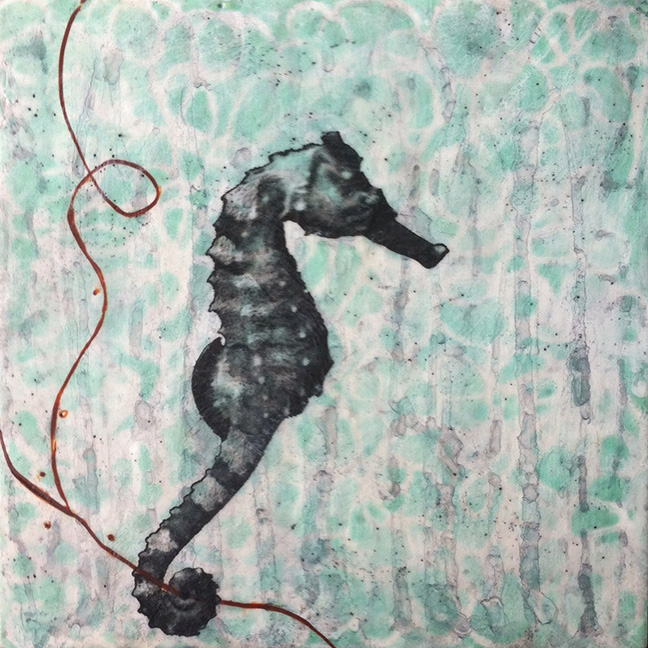
Your image doesn’t disappear. It deepens.
Beeswax is translucent. When you build layers over and around a photograph — adding pigment, texture, embedded papers, marks made with tools you’d find in a kitchen drawer or a hardware store — the image takes on a physical presence it never had behind glass. You can feel the surface. The light moves across it differently depending on where you’re standing. People walk across a room toward it.
That quality — luminous, layered, genuinely impossible to replicate digitally — is what this process makes possible. And it begins with a photograph you took.
You don’t need a painter’s background. You don’t need any encaustic experience. You need a photograph you care about and a willingness to see what happens when it meets something new.
“I’ve been a photographer for a long time, and I wasn’t sure encaustic was for me. It felt too ‘collagy.’ Then I came across Clare’s work and wanted to know how she did it. I was excited to find out she’s a photographer who speaks my language. It’s important to me that the photo is at the forefront. Not just something added on top of the image — the photo tells the story and the encaustic enhances it. This is exactly the look and feel for my work that I’ve been trying to get for a long time.”
— Andrea Peters
The course moves through six modules, each one building on the last. You work at your own pace — there are no weekly deadlines, no required login times, no calendar to keep up with. The modules are there when you are.
Thinking Differently About Your Photographs
Before you choose a photograph, before you touch the wax, there’s something more important to figure out: what kind of work do you want to make?
This module begins not with technique — but with vision. You’ll look at work that moves you and start paying attention to why. What draws you in. What leaves you cold. What you want your own images to carry. That clarity — about mood, emotion, the feeling you want your work to hold — will inform every decision you make from here on. Which image to choose. How much wax to add. When to stop.
This is the foundation everything else rests on.
It’s also where this course parts ways with most others. Starting with vision before technique is a deliberate choice. It signals what kind of course this is — and what kind of photographer it’s made for.
Painting Your Photograph
This is where your photograph first meets the wax.
You’ll learn how to print and mount your images, select the right paper, and work with substrates and grounds. Then you’ll begin painting — using encaustic paints, pigments, oil sticks, pastels, and watercolor to add color, feeling, and a quality of light that no digital process can replicate.
Your photograph doesn’t disappear here. It deepens.
Adding Depth + Texture
This is where your work starts to surprise you.
You’ll explore techniques for building visual complexity into your pieces — masking with tape, layering and scraping, inlaying wax, shellac burns, embedding objects, creating both smooth and richly textured surfaces. These aren’t tricks. They’re ways of adding atmosphere, mystery, and a quality that makes someone want to look longer.
Embedding Your Image In Wax
One of the most beautiful techniques in photo encaustic.
You’ll learn to print your photographs on tissue paper and embed them into layers of beeswax — a process that changes how an image feels entirely. The photograph becomes part of something larger. It gains depth, luminosity, and a quality that stops people in front of it.
There’s a lot to hold at once, and the results won’t always go the way you planned. That’s not failure — that’s tissue paper. The unexpected is part of what makes this technique so compelling.
Photo Transfers
A different kind of challenge from anything you’ve worked with so far.
With tissue paper, you can see exactly what you’re going to get. With transfers, you’re embedding only the ink — and you won’t know until the very end how much of the image came with it. A frayed edge, a mysterious fragment, an image that only partially arrived — these aren’t failures. They’re what transfers do.
This module covers image selection, surface preparation, and the transfer itself — in that order, for good reason.
Bringing It All Together
You’ve made it to the last module — and this one is different from everything that came before it.
There are no new techniques here. Instead, you’ll watch Clare work — moving fluidly through five complete pieces, combining techniques from across the course into finished work with distinct moods and directions. This is what the full process looks like when it belongs to someone.
By the time you finish this module, it will start to belong to you too.
“I used to love the darkroom — working with my hands and watching the image slowly appear. That was always the best part for me. Digital photography never really replaced that. It feels flat, a lot of time in front of a screen, not enough time with my hands. With photo encaustic I feel much more connected to what I’m making. It’s physical and layered, and I can change the work as I go. My work no longer looks like everyone else’s. I brought a piece to a small show and people responded to it differently than anything I’d shown before. There’s a mystery and ethereal quality I just couldn’t get in my digital prints.”
— Margaret Denton

Clare O’Neill came to photo encaustic as a photographer. Not as a painter, not as a printmaker — as someone who sees through a lens first and has always asked everything else to serve that.
That is still how she teaches.
The camera you bring to this course — whether it’s a professional body you’ve invested years in, or an iPhone you pull out because the light is doing something you need to catch — is the beginning of everything. The encaustic process doesn’t replace your photographic eye. It gives it somewhere new to go.
Clare has been teaching photo encaustic for more than a decade. She personally answers every question in the alumni group. She lets people struggle with a piece she suspects has gone wrong — because she’s learned that the best work almost always comes from the ones who kept going anyway.
She is based in Minnesota and travels to Ireland every year, where she has been going long enough to know which pubs have the best light in the afternoon and which roads are worth pulling over on.
People ask about this, and it deserves a straight answer.
Working with heated beeswax does produce fumes. At proper working temperatures — between 180 and 200°F — those fumes are low-level. The key is ventilation: you need to actively move air out of your workspace. A window fan positioned to exhaust outward works well for most home studios. An open window alone is not enough.
A few other things worth knowing: keep your wax at the right temperature (a surface thermometer or infrared thermometer makes this easy), avoid solvents entirely (none of the techniques in this course require them), and keep a fire extinguisher in your studio. If you notice headaches or any respiratory irritation, stop and get fresh air — your ventilation needs attention.
These are not complicated precautions. They are simply the right ones, and they make this a process you can work with safely and regularly. Full safety guidelines are included with the course.
I live in Australia and wanted something online. I liked the self-paced format — being able to watch the videos while travelling just to get a sense of what was coming, then come back to them when I had time without feeling lost. I worked through everything at my own pace, repeated sections when I needed to, and moved on when it felt right. That flexibility meant I actually engaged more deeply with the process. I finished with work I’m really happy with.
— Mary Kane
This course is for you if you’re a photographer — at any level, with any camera — who has felt the pull toward something more expressive than a flat print. You’re curious about what beeswax and pigment might do to an image you already love. You’re willing to make a mess. You don’t need a masterpiece on the first try — you need a process worth returning to.
You’ve been making photographs for a while. You know what it feels like when an image almost says what you wanted it to say — and what it feels like when it doesn’t quite get there.
This process gives you somewhere new to take those images. Not instead of photography. Because of it.
It’s also for you if you’ve never touched wax in your life. That’s exactly why Module 1 exists.
All six modules, all 19 video lessons, transcripts, studio notes, practice projects, materials guide, and ongoing access to the alumni community. Download everything and keep it.
Do I need encaustic experience?
No. The course starts at the very beginning and builds from there. If you can make a photograph, you can begin here.
What camera do I need?
Whatever you have. People bring professional DSLRs, mirrorless cameras, and iPhones. The process doesn’t care. Your eye does the important work.
What supplies will I need?
A full materials list is included with the course. Everything is available online. You don’t need a specialty studio — a dedicated workspace at home is enough. A class kit is also available if you’d prefer a streamlined option rather than sourcing individually.
Is the course live?
No. All six modules are pre-recorded and available immediately when you enroll. No required login times, no weekly schedule to keep.
Will I finish this without a weekly deadline?
The modular format is designed for real life — each module is complete, so progress always feels tangible even if you work in short sessions. And the alumni community is there throughout: a place to post your work, ask questions, and hear from others at every stage of the same process.
How long will I have access?
Download everything — all videos, transcripts, studio notes, and resources — and it’s yours to keep.
Is there a community?
Yes. The Members Only Alumni Facebook Group is an active, warm community of photographers and artists at every level. Clare reads and responds to questions there personally.
What happens after I register?
You’ll receive a welcome email with login details for the classroom. Inside you’ll find your materials list, safety guidelines, and everything you need to get started. When you’re ready, go to Module One and begin.
Is it safe to work with wax at home?
Yes — with the right setup. See the safety note above. Full guidelines are included with the course.
When is the course offered again?
Registration opens 2x a year, usually in the spring and again in the fall. Sign up to be on the mailing list or shoot us an email at info@photoencaustic.com, and we will make sure you know when it opens again.
We use cookies to improve your experience on our site. By using our site, you consent to cookies.
Manage your cookie preferences below:
Essential cookies enable basic functions and are necessary for the proper function of the website.
OptinMonster is a powerful lead generation tool that helps businesses convert visitors into subscribers and customers.
Service URL: optinmonster.com (opens in a new window)
Marketing cookies are used to follow visitors to websites. The intention is to show ads that are relevant and engaging to the individual user.
Pinterest Tag is a web analytics service that tracks and reports website traffic.
Service URL: policy.pinterest.com (opens in a new window)
You can find more information in our Cookie Policy and Privacy Policy.